Guest blog / Jenn Hannotte: The perpetual kitchen reno

Jenn Hannotte: Last October, after my youngest pulled what looked like 1930s underwear out from behind the radiator in our kitchen, I called John at Cera Stone. "GUT IT," I said. Really, I didn't *want* to renovate the kitchen, I wanted to live with it and save up for the real-deal. 

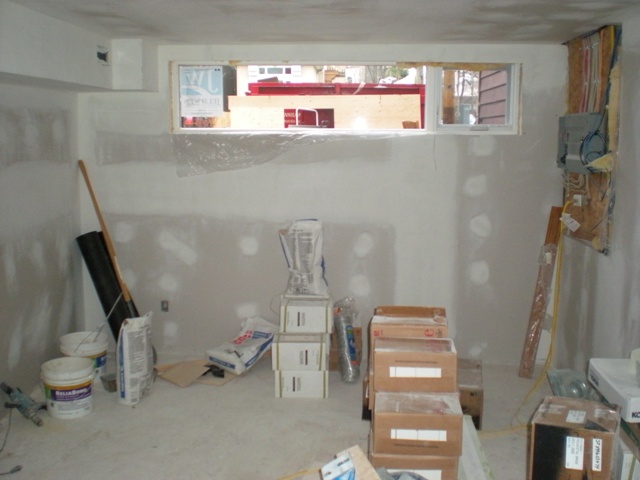
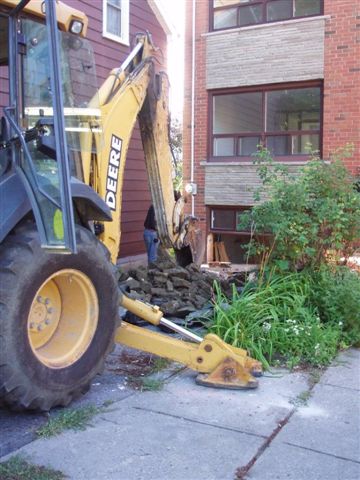
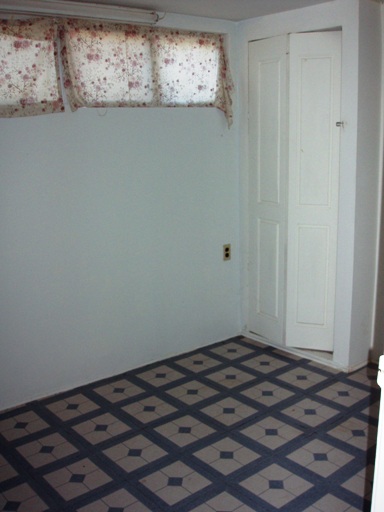
But after the underwear, and because earlier in the summer I had removed all the cabinet doors because they were covered in SLIME, and because after the bathroom renovation we had a big ol' hole in the kitchen ceiling thanks to the old toilet losing it's shhhhh all over the place - well, it wasn't a kitchen anymore. And so, like I do, I started to rip things apart myself and discovered the original asbestos-tiles, and while not exactly good for the lungs, they were in really good shape which gave me hope for the pine-plank subfloor. Yes, we were going to gut the kitchen, but, no, we weren't going to spend much putting it back! Once everything was out, I decided to have a wall framed out over the messed up plaster that held the old cabinets in place, and we clad it in beautiful birch plywood. The sink, stove and fridge all stayed in the same place to keep costs down. A couple of base cabinets from Ikea, an inexpensive butcher block countertop, rough-pine shelf from Home Depot ($12!) and bingo, we had a kitchen. 

Okay, it didn't go that smoothly - I have hung different cabinets and shelves, moved the fridge around, painted the floors after resolving not to, and painted half a wall black before deciding (surprise!) white it was! This is a temporary kitchen - if temporary means 5 years or more to you. So, because we'll be living with it for quite some time, we figured that we might consider getting some appliances that work. I know people go on about "function and form" all the time, but sometimes I like to ignore that and spend money in places we shouldn't instead of... .getting appliances that work.

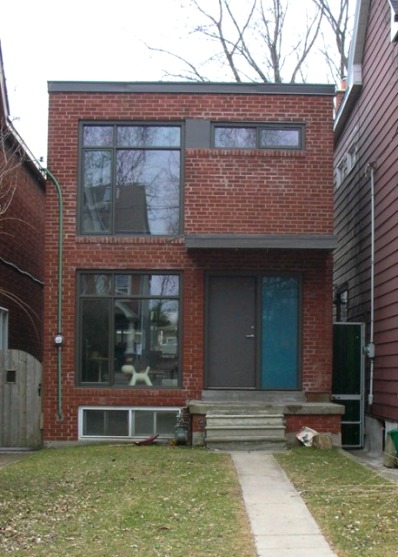
And so, this week a new crop of appliances that will bring harmony to the kitchen are set to arrive. Appliances that marry form AND function. I know, what a concept. Once they're here and installed I promise a full kitchen tour. For now, here are some shots of the before and during - and a sneak-peak of the 'after', shot for the Marion House Book last month! (which, incidentally, already looks different!)

For more of Jenn's take on style click here.

Guest blog / Jenn Hannotte: The bath equation

Jenn Hannotte: My bathroom renovation began about three months ago, and we're still working on some finishing touches before we can present the BIG REVEAL. But until then (soon, I promise!), I thought I'd recount the story thus far. Trouble is, it's not terribly interesting. Nothing scary jumped out from the walls, there was no layer of black mold ready to poison my children, no hiccups with the contractors or materials. The only reason why it's taken as long as it has is because I had to go and choose things that you can't grab from your local big- box store.

You might recall that my main source of inspiration was the bathroom featured in the film, The Royal Tenenbaums. To get there, we used a lot of classic materials that really fell architecturally into line with the aesthetic of the rest of the house. Always-right and inexpensive Daltile white subway tiles placed 3/4 of the way up the wall from Home Depot, capped with a classic chair rail profile found at Pollock's on Roncesvalles, just down the street from me. For the floors, it was again Home Depot's Daltile in the 'Octagon and Dot' pattern. I sourced a cast-iron clawfoot tub from Craigslist for a steal at $150 including the faucet, shower head and tub surround. The toilet is from Kohler and it's amazing to not be terrified every time we flush like we were with the old one! My favorite piece is the sink - the Brockway from Kohler. It was this baby that we had to wait for a long time to arrive, but it was worth it once installed. 

Without giving too much else away, I found this amazing wallpaper from Ferm Living that looks pretty   much identical to the shower curtain you see behind Margot Tenenbaum that really sets off the entire space. So the question is, class, can this equation be solved?  


No parking allowed

Yes, our media room used to be a drive-down garage, but that all changed back in the '80's sometime (way before we bought the house) when, in a rather hare-brained scheme, the old owners bricked up the garage door and filled in the driveway to create a v. dingy basement apartment. Oh, it was a delightful surprise when we discovered that that there was only one layer of bricks and some rotten chipboard holding back all the in-fill, take a look here, which meant we had to do a major bit of re-construction.

Fast-forward to now and things are all peachy - That's a Gus* Carter sectional sofa, silk velvet pillows and woven cane hassocks from Constantine, and a fab hand-knotted floor cushion from Bev Hisey. The striped velvet curtains have been discontinued at Ikea, but you can still get your hands on the Kvartal curved curtain rail, as well as the wall-mount Besta Burs DVD storage (topped with a few of my fave collectibles). On the other side of the room you'll catch a white leather tufted chair, an end table, and more of the shaggy rayon rug, all from Elte. Then there's more of that great Ikea Besta media storage, working both as a stand for the LCD TV, and mounted on the wall (we had fun tricking it out with Dioder LED lighting strips). The paint colour is Palais Royal by the no-longer-available Ralph Lauren Paint line from Home Depot. And, thanks again to Angus Fergusson for doing such an outstanding job in shooting the house for House & Home!

Guest blog / Jenn Hannotte: The royal treatment

Jenn Hannotte: Ahh, the sweet, suffocating smell of plaster dust! We're knee-deep in it over here, tackling the family bathroom. When we bought this house, we thought we could live with it for a while. We thought that we could clean it up, and it would be OK. We thought maybe some new towels would help. We thought WRONG. The 'before' picture provides some visual evidence, but the real issue here was the smell. And the strange textures that stained every surface. I won't elaborate, but suffice it to say we are very happy to have it all GONE! It was demo- day here today, and the folks from Cera Stone (who I also used to renovate the main floor of the last house) knocked it out efficiently as ever.

Finding inspiration for the bathroom wasn't a problem. It seemed everything I saw, I loved. Especially anything dark and vintage, with an industrial twist. Like Jenna Lyon's en-suite, or this gorgeous bathroom from House & Home by Connie Braemar. But, I wasn't quite sold on the idea of going to the dark side - something wasn't quite grabbing me. And then, as I do a couple times a year, I was watching The Royal Tenenbaums and there it was, my future bathroom. Nothing dark about it, but oozing original vintage charm with a fresh colour scheme and those great set details found in all of Wes Anderson's films. How close the final product will be to the bathroom Margot Tennenbaum spends  "six hours a day locked up in...watching television and soaking in the tub" remains to be seen, but the hunt is on! [Image 2 via Habitually Chic. Image 3 by Virginia Macdonald]

For more of Jenn's take on style, as well as to see the beginnings of her own reno project, click here.

Guest blog / Jenn Hannotte: What's the 211?

Jenn Hannotte: If you're reading this, chances are it's because you're a design blog-aholic. Never one to leave the party first, I offer to you this new reno-blog (complete with live-cam!) that promises to be thoroughly intoxicating. The Temporale's are a young family who have decided to move up - literally. They've been living in their east-end Toronto home for 6 years and have gutted it and smartly transformed it into a modern nest. But with only two bedrooms and four family members, it was time to make the decision: sell, or renovate? With no where to go but up,  they are constructing a 3rd floor pre-fab addition, and if the pictures from the rest of their home are any indication, it's going to be spectacular. The snaps below show the before and after on the front of the house, and a peek at the interior, before the old roof was peeled off and construction started. Check out 211 Bain to follow along!

For more of Jenn's take on style, as well as to see the beginnings of her own reno project, click here.

Where we were, and where we're at

Well, while the interior of the house has been completed for a while (you'll see the results in the August issue of Canadian House & Home!), the exterior of the house has been somewhat of a head-scratching work in progress. That first shot below shows the house in all its grimy pink curtained glory when we first bought it, the second, after the fantastic energy-efficient new Jeld-Wen windows went in during the midst of the reno (check out more reno snapshots here). The thing is, the driveway still looks pretty much the same, complete with tired asphalt and broken concrete.

So now I'm on a mission to get it looking at least passably attractive, though the main issue is the mammoth size. It's 20' x 30' with parking for 3 cars. Seriously. I'd been noodling around materials and decided initially on simple and modern exposed aggregate concrete (take a look here), and got a couple of quotes. Errr, one arrived at an eye-watering $16,000. So now we're Plan B-ing it and looking at different options. Oh, and did I mention I want to get this done in the next couple of weeks? Wish me luck.

Roughing it

Sometimes, in the midst of renovation hell, while you're ripping down walls and tearing out old plaster, something unexpectedly gorgeous can suddenly appear. Just check out these shots by Donna Griffith, over on my friend Bev Hisey's new blog, covering her full-on back to the studs reno. That got me thinking, about how imperfection and history in a space really can add gobs of charm. Have a look at the snaps below from Zanotta. Those rooms wouldn't look half as cool with plain old beige painted walls. But really, do you want to be brushing flakes of plaster off your shoulders every time you toss yourself into that sleek William sofa, or sit down for a bite at the Album table? Well maybe, especially if it would mean living with those vintage herringbone parquet floors...

Guest blog / Jenn Hannotte: What goes around

Jenn Hannotte: While Arren had the good fortune to physically enjoy the ICFF this year, I had to get my virtual fix and have been scouring all the blogs who have covered it. Apartment Therapy's founder, Maxwell Gillingham- Ryan, recently posted this over-view of some of the new wallpaper designs showcased. What really caught my eye were the new bold florals from London-based pattern designer, Camilla Meijer. Check out her 2010 intro, and compare to a wall in my new home with its original vintage paper. Now that's a bit of a déjà vu!! Maybe I should keep it... [Images 1,2 via Apartment Therapy]

For more of Jenn's take on style click here.

Guest blog / Jenn Hannotte: Movin' on... up?

Jenn Hannotte: Okay, everybody relax. No need to get up in arms about my absence; let me explain. And no, I'm not going to blame it on the kids (this time), I'm going to blame it on Real Estate - capital R, capital E. I let the beast take hold of me again and I've gone and sold our house and bought another one a few blocks away, all thanks to the most amazing agent in Toronto, Nutan Brown. But I had good reason - a couple of good reasons, actually. We moved into our current house about 2 1/2 years ago and transformed it from a gold damask (in a bad way, trust me), brown carpeted, stippled mess into a pretty charming and hip abode if I do say so myself (check out my Flickr page here for the befores-and-afters of that ordeal). The main floor got a new kitchen, new floors, new laundry/mud room and upstairs got a coat of paint on every surface, including the floors. There are a lot of classic elements that remained intact from the 101 year old home that are blended with a modern and trendy reno. And that's the thing, folks - it's trendy. That, combined with a housing market that may or may not 'burst' meant that if we were going to reap the rewards from all our hard work, it was now or never. Thankfully, a young couple fell in love and in 5 short days the showings and open houses were over.

Our new house is a 'forever' kind of home. She's big and beautiful and needs a TON of work, so I'll be sharing some of that work and inspiration here as we move from project to project. Oh...did I mention we have to do it for practically free?* We're dubbing it the No-Money-Makeover and it's going to likely mean Craig's Listing, dumpster diving, recycling, street-walking....no, that's too far....and how ever else we can work towards a 'temporary' solution using cheap and clever tricks until we can get to the big stuff in a few years.

Here are a few snaps of the 'new' house below to kick-start brainstorming! Is that a fire place in the entry way? Why, yes it is! Beamed ceilings in the dining room? Check. Stippled plaster everywhere? Sure!

For more of Jenn's take on style click here.

*A disclaimer: The whole house needs the knob and tube wiring removed - a big job at an even bigger ticket price that needs to be done ASAP. so it doesn't count. Because I said so.

Cottage envy

Just a quick one, since I'm just plain green with design envy after checking out John and Juli of Kitka Design's cottage reno. I don't have a cottage, and the last time Meg Crossley, myself and Donna Griffith travelled out of town to shoot one for Canadian House & Home I lost sleep worrying about wolves and bears. Perhaps I'm not the outdoorsy type.

Anyhoo, please do click here to see the rest of their charming cottage. It's absolutely cool and and filled with lovely vintage finds - I think they should consider renting it out - and (if they need another opinion) they definitely shouldn't paint out that lovely old stone fireplace.

Living in uproar

After taking a bit of a breather from the reno side of the house project we're back at it, nose to the grindstone on the last push to getting everything nice and done. Yes, things are a little crazy - Everything has been pushed away from the walls and covered in plastic so our painter can get at the baseboards, doors and windows. Then, while that's going on, we're taking on the painting of the walls before the wallpaper happens (hopefully next week). That first snap below is a reminder of what the basement media room looked like in the midst of the reno, the second is where we're at today; the walls and ceiling are finally primed, all ready for some gorgeous Ralph Lauren Palais Royal to get slapped up. The rest of the basement walls and ceilings were primed too, and next we'll be taking on our mondo stairwell, where we'll be attempting the rather acrobatic job of priming and painting that space as well. Wish us luck!

Digging for victory

The garden is slowly being tamed. David started clearing out the junk on one of the first warm days a couple of weeks ago, digging out a fair few concrete blocks and bricks, lots and lots of bricks. We set to work again yesterday, removing the remainder of the bricks from what appears was once a pathway that ran right through the centre of the yard. Over the years we're guessing it had kinda sunk and ended up a couple of inches below the surface. Next up, we'll be bringing in the heavy equipment, a rototiller, to give the soil a going over before we seed with Eco-Lawn (a low maintenance, drought tolerant grass). Then with more heavy equipment, courtesy of David's dad, we'll be cutting the metal fence poles and removing the very tatty chain link fence. One step a time (lol), and hopefully the local woodchuck, who was sunning himself in the garden the other day, will approve.

Bookmark and Share

Imagine the sparkle

Okay, I hardly need to remind you that I'm not a photographer; one look at the snap below will tell you that, lol. I've spent far too much time trying to catch the shimmer and sparkle on the recently tiled and grouted backsplash, and all to no avail. I'm hoping you can figure out that they're a gorgeous 2" x 12" ribbed glass tile that's back painted in white. If not, you'll just have to squint a little and use your imagination. The tiles are called Taffeta; they're from DalTile and are available to order through Home Depot. We ran them from countertop to ceiling and wrapped them into the window well above the sink too. I can't tell you how happy I am that we went with a stacked pattern for the tile - rather than having them laid brick-style - it keeps everything feeling nice and modern. And yes, this is one step closer to us being finished...

Bookmark and Share


Yes, we painted the stone

Okay, cue flashback. We're travelling back in time slightly, since the house is thankfully way more organized than you'll see below. To remind you, the Montigo fireplace had been installed, framed and then faced with concrete board while we decided on exactly how to finish it off. Luckily we scored some edgestone tiles that had the perfect look, but a less than perfect sickly pinky-beige colour (ugh). Our solution, which frankly horrified the contractors, was to paint them out so we would be left with the texture of the tiles and a sense that the fireplace and stone surround had always been part of the house.

The before shot doesn't quite do justice to the tile's fugly colour (it almost looks good, lol). The second shot shows the tiles primed (thanks, as usual, to Zinsser Bulls Eye 123), and awaiting a final coat or two of trim colour in a semi-gloss. What do you think? And, if you fancy, click here to see the story so far on the reno.


Bookmark and Share

Trading in plywood for Corian

Okay, the last time you saw the kitchen it looked like this, and now take a look! The Corian countertop arrived today from Home Depot in two mondo pieces, one so large it took four guys to heft it into place. The installer's attached the two pieces together (there's now an invisible seam behind the cooktop) and set the brushed nickel adjustable-height legs from Richelieu in place for the bar. The wait was definitely worth it (we've been living with chunks of plywood and a temporary sink for a while). We'd picked Silver Birch for the surface, since it had a lovely terrazo feel, and chose a clean and modern profile with an eased edge. The sink is Corian too, in Pearl Gray, and was fit seamlessly into the countertop before the whole shebang was installed.

All the appliances are happily ensconced into the kitchen now too. They're from Jenn-Air in a stainless steel finish and are absolutely boffo with the hi-gloss white Venicia cabinetry. The fridge is a sleek counter-depth unit with a bottom-drawer freezer, the dishwasher is one of the best Energy Star rated units on the market and the dual-fuel slide-in range, well, I love the fact it has a downdraft (so no need for a rangehood!) while David, my baking-obsessed other half, loves that one of the burners has a melt setting for when he makes brownies.

The cherry on the cake is Kohler's swish Karbon articulating faucet; this one is a deck-mount, but it's just been released as a wall mount too. It's currently just there for show; the plumber is popping in tomorrow to hook it up, and the backsplash tiles happen the day after that. I swear, we're almost done! 


Bookmark and Share

Men at work

After all the ugliness with that bricked up garage door in the basement (take a look here) we had to take drastic action and a fab crew was called in to take care of it. They arrived bright and early Saturday morning with heavy equipment and set to it. The backhoe sliced through the asphalt like buttah and then made quick work of the fill (basically construction scrap and garbage) to reveal the drain and the soon to be replaced brick wall.

It's just lovely to see good work replace bad, taking us one step further to getting stuck in to the interiors. Not to be outdone, David and I kept busy by fishing out black crud from a basement drain that was slightly on the blocked side. Will the fun never end? lol 

Destruction

TV is filling my time right now; for the last couple of days I've been on set with The Style Dept, shooting the final episode. Of course the house stuff is still happening - Yesterday David (while chatting with our contractor) went hell for leather on the main floor to start removing drywall and exposing beams. A crowbar, a sledgehammer (and a fair amout of brute strength) and this is the result. 


Pretty nasty

The basement at the house is a bit of a horror show; small dark rooms, icky vinyl floor and spiders, lots of spiders. And well, now things are a bit worse in basement-land... We knew there had been some funny business at some point with the house since the drive-dowwn garage had been bricked-up and the driveway levelled, all to make the basement larger. The funny business was confirmed when a neighbour mentioned that they'd gone to bed one night and woken up to see the work had been done. Funny indeed...

Now, this wasn't a major surprise since our house inspector had mentioned damp issues in this one wall, but still, y'know, in my head at least it's all butterflies and sunshine. We set too ripping off the drywall (well, after a brief trip to Home Depot to pick up the right tools since garden shears weren't quite doing the trick, lol) and you can see below what we discovered. Basically one layer of bricks, 2" x 4"s and some insulation (and a whole lotta damp) is the only thing holding up the driveway. Oh, and they'd kindly left the old wooden garage door frame in place too - Thanks.

Our contractor came over last night and gave us the lowdown - Removing the concrete and asphalt from the front of the house, digging down and removing and replacing the wall with something that's actually structurally sound and, oh, waterproof. Lovely.    

Rotten and rusty

So here, as promised, are the pics of the back of the house - No more raccoon hotel under a mouldy deck and no more waist-high weeds either. Everything, including a half buried rusty old swing set, made it into the full-to-brimming skip. As usual there were suprises; like the deck's rottten support beams that are actually tied into the brickwork, and the bee's nests in the siding. After all that, David is bruised and achey and Graham claims he was hit by a train.

There are more suprises to come, just part of the joy of older an older home. I know, it's not a Victorian, but even a sprightly 43 year old can have some issues. Take a look at all the 'before' pics in The House Project gallery to do a quick compare and contrast. Oh, and why do you think that the upper windows still have their original aluminum frames and glass and then new vinyl windows on the inside? Strange. 


The next tour starts in 5 minutes

The tours have begun. Kind words and concerned looks are the norm, and everyone has ideas, which is always helpful. The place really is a blank but dirty slate - and of course the bathrooms get the most reaction (we've heard a lot of 'eeeeeewwwwws'). But the question is this, do we need a powder room on the main floor? In it's current state it actually has a shower stall in there too (huh?), which definitely won't stay. But should it disappear entirely? The choices that are floating around (I kind of see them as thought bubbles) are - Keeping it but making it smaller. Changing it into a laundry room. Losing it entirely. I'll let you know which thought bubble wins...

In the meantime we've been shopping for loos (fun!) and this is our Top 3. The new Saile from Kohler; a sculptural little dual flush number (0.8 or 1.6 gallon consumption). The Happy D by Starck for Duravit; quite the modern classic in the loo world (1.6 gallon consumption). And finally, the Aquia from Toto; a fave brand and a very simply styled dual flush (0.9 or 1.6 gallon consumption). But lets start everything off with a pic to remind you of the powder room (everybody go 'eeeeeeewwww').