Green is good

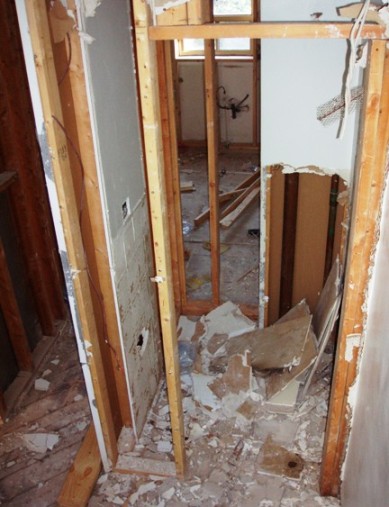
While we're dealing with some scheduling issues on our reno (the windows are arriving after the kitchen = ugh) a couple of cool projects dropped into my inbox and I thought they were worth sharing. Moss Sund Architects did a brill job on both these Toronto homes.

Neither are new builds, they're both modern and thoughtful renos of modest family homes that maximize green solutions - Each has geothermal heating, is designed for passive solar heating and is kitted out with a green roof and rain harvesting system. And, everything used on the homes was locally sourced, recycled material.

The first is an update on trad High Park brick home with a 2-storey addition. The second took a Beach bungalow and gave it a modern second level (love those cedar shakes). Click here for more info and to take a boo at the interiors.

On the tiles

While we've been waiting for that steel beam to arrive for the main floor work has been happening on the master bathroom. Yay! A step or two closer to actually getting finished and moving in; I can't tell you how exciting that actually is!!! Yep, definitely a 3 exclamation mark moment.

I'd worked on the design and picked out the finishes and fixtures a while back (they're all special order from Home Depot) - 

The tiles are all Daltile; the large rectangular ones are for the main bathroom floor, while the mosaic is for the shower area. Mantova, that's the name of the swanky hi-gloss Carrera marble look tiles, will go from floor to ceiling.

Ummm, is it weird to get excited about a toilet? Oh, the joys of home ownership, lol. Kohler's Purist Hatbox toilet is the bee's knees, add in their Oblo wall-mount faucet and the WaterTile ceiling-mount shower fixture for the walk-in shower (there'll also be a Purist hand shower in there) and, well, I may never leave...  

The house project gallery - Updated

I've updated the The House Project image gallery to give more of a sense of how the renovation is progressing. Not exactly a 'before and after', more of a 'before and in-between' view of what's going on in almost every room. Click on the button above or here to catch all the shots in the gallery and, to read about our travails so far, click here. More to come, since work is moving ahead slowly but surely, but we're getting a little iffy about that January 1st move-in date!

Petite problem

While we wait on the permit to approve all the walls coming down on the main floor other work has been continuing - Framing has started on the kitchen wall (it has to be pushed out to conceal venting), and the master bath and powder room have been framed too. That powder room has been giving us major headaches, it'll be small, not quite airplane small but we definitely won't be holding a cocktail party in there anytime soon.

With size and space in mind we've had to re-jig the toilet and sink we'd originally fallen for and plunk for practical instead, though of course they're no less shabby in the looks department. Kohler's Rialto toilet has pretty much the smallest footprint on the market so was the perfect pick, and the Minette corner sink by American Standard is the most petite we could find - Yay for Home Depot! And, since we've been talking looks, I wanted to include a snap of the crazy glam wallpaper I dragged back from Paris; pretty fab no? Quite the steal too, at only 16 Euros a roll (I love BHV!!!). I'm thinking it'll cover not only the powder room walls, but perhaps even the ceiling and the door too.

Take a look below, and to catch up with the story so far on the renovation click here.

Home work

"What's up with the house?" Every Tom, Dick and Harriet have been asking, so here's the up-to-date deelio with where we're at on the reno front. Nothing too picture worthy unfortunately, though lots of behind the scenes stuff has been happening to move everything forward.

Cera Stone, our fab contractors, have had the electricians in to completely re-wire the house (we had aluminum wire which had been crazily jacked around in a previous reno), so there have been tons of decisions on lighting (where to put the pot lights), switches, outlets and phone and cable. I was hoping for an elegant solution for oullets in the master bathroom, since I'd like them hidden in cabinetry, so we'll see how we do with that. The re-wiring is almost done and is waiting on construction to start before it can be completely finished.

On the 'major' side of things we've had the architect in to draw up plans for the main floor since we want to, umm, remove all supporting walls. That means beams, baby. One huge steel one and perhaps two wood ones tied in, all concealed in the ceiling (we'll lose about a 3/4"). Once the plans are in with the City we'll be waiting on permits to get on that stuff (more picture-worthy for sure!).

So, we're pretty much on-schedule - But, will we be cracking open the Veuve on New Years in the new place?

To take a look at all the before shots on the house click here, and to check out all the story so far on the reno click here.

Quality workmanship

When our new place was built in 1965 they really knew their stuff, but ever since then everything that has happened to the house has been, well, weird. Apart from the obvious (a shower off the kitchen) we've been finding lots of evidence of what I can only describe as quality workmanship. When pulling out the walls in the master bath we found Coffee Time coffee cups and bits of drywall and wood shoved into the walls - was it for insullation? Nice, but nothing compared to the delightful mess that was awaiting us in the basement.

Previous owners, the ones who had the brainwave to brick up the garage door, also did lots of other 'smart' renos in the rest of the downstairs. We had no choice, all the drywall had to come down so we can re-route services up to the second floor, but boy, did we have a suprise or three. A dropped ceiling suspended from hundreds of bits of old wood - including a chair leg - hid a spiders web of wiring so spookily bad that our contractors, Cera Stone, said it was sheer luck that no-one had been electrocuted. Then the wall came down. Behind it we found more 'insullation' in the form of garbage, part of an old fence and a few plumbing parts from a toilet. All lovely of course, but one day soon this will be quite the fab laundry room. Take a look here to catch up with the story so far on The House Project.

Splash pad

With all the stuff I'm working on right now, things are varied to say the least - In no particular order (and without giving too much away); fairies, christmas trees, bedrooms, bathrooms, sofas and washers and dryers. Ah, the life of a freelancer!

Other than all of the above (it's making my head swim) I've had my mind on bathrooms. We have 3 in the new place to re-configure, re-design and re-consider. Size, space and style are all at play, let alone actually deciding on fixtures and tiles. Phew. So, I'm on the hunt for inspiration and found quite the sophisticated spot while flipping through Home Depot's new DreamBook magazine. Love the dark grey stone tiles and that free-standing bathtub is definitely an ultra glam statement. Take a look -

Sweet petite

Who doesn't love a makeover? Canadian House & Home must've figured out that just about everyone does, as their Makeover special issue has just hit newstands with a resoundingly pleasing thud. There's ton's of great stuff to check out, but my fave is the feature produced by design smarty-pants Stacey Smithers. It's a quiet riot of creamy greys, warm acidy yellows and spicy pinks (yummy) that all adds up to quite the chic look - I could totally move in.

Now, fairs fair - Stacey is a mate of mine (I can hardly think of anyone else I'd rather share a highly calorific meal with, lol), but this place is quite the marvel compared with it's grubby past. You'll have to check the mag for those scary before shots, but take a peek below to get a taste of a young couple's sweet new home. Photography by Donna Griffith.

Quick pick

I have to tell you, this little monkey has been quite the handy tool during all that demolition. The Stanley FatMax Wrecking Bar is smaller and easier to handle than a full-size crowbar - perfect for getting into tight situations - and the banana yellow colour means it's easy to spot, even under a layer of dust and debris. Hit the Home Depot to pick one up, and stick it into your tool box for safe keeping - You won't be sorry!

Bare bones

That's just about where we're at with the new house; back to bare bones. After two stellar days when Manuel, David's dad, came to lend a professional hand we've made major progress. Before Manuel's arrival we were removing the drywall by literally smashing it with the sledgehammer, errr, fun but not exactly the smartest route. Now we use the jimmie, jimmie, lever technique; which brings a whole sheet down at a time. Who knew? Though, like high school calculus, we might not ever have any real-world application for this in the future (fingers crossed).

We're onto skip number 4 (the neighbours are counting, lol) and have pretty much hit a brick wall - All the old flooring is up throughout the main and second floor, we're back to studs on all walls that we're hoping to remove and the main floor ceiling is down too. Removing the strip wood flooring is the biggest pain ever, mainly because each and every nail has to be pulled out by claw hammer and - there -are - thousands - Ugh. We've just about crawled over every inch of sub-floor on nail patrol.

Next step is for our on-the-ball contractors Cera Stone to draw the plans, permit, and then execute setting a steel beam and two wood beams that will support the second floor.

The first couple of pics show what's left of the main floor living area, and old main floor shower room. The second couple show the master bedroom with the closets knocked out and the master bathroom sans tub, toilet, and wall. And, take a look here at the work on the house so far.

Men at work

After all the ugliness with that bricked up garage door in the basement (take a look here) we had to take drastic action and a fab crew was called in to take care of it. They arrived bright and early Saturday morning with heavy equipment and set to it. The backhoe sliced through the asphalt like buttah and then made quick work of the fill (basically construction scrap and garbage) to reveal the drain and the soon to be replaced brick wall.

It's just lovely to see good work replace bad, taking us one step further to getting stuck in to the interiors. Not to be outdone, David and I kept busy by fishing out black crud from a basement drain that was slightly on the blocked side. Will the fun never end? lol 

Destruction part deux

The more ripping out we do ourselves, the better our budget will be stretched over the long term on the house.- smart words, though the reality is a fair bit dustier.

So far most of the walls on the main floor have gone, add in the walls dividing the basement, and a few up on the top floor and you can see why we've already filled two skips to the brim (there's still more to do). I must admit it's fun swinging a sledgehammer, and I've become quite the dab hand with a crowbar too. Add in the fact that this, for the most part, isn't your regular 2008 drywall that we're ripping out, nope, it's vintage 1965 built-to-last concrete board with a nice layer of plaster. Quite the workout.

For extra giggles it's always fun to see what's behind the walls, or ceilings; a showering of mousepoop is always a refreshing remider that the house has had a few occupants over the years.

Below you can see me smothered in dust, bemasked and protected by thick suede gloves and a v. cool hardhat (cheers M and C).